How To Create Color Splash In Photoshop
The color splash effect puts the focus of an image on a single “splash” of color, while everything else in the image is muted or black and white. This is popular in portraits, where an article of clothing or a person’s eye color is the only colorized component of the photo. This effect is fairly simple to achieve in Photoshop, and it can make even a novice photographer look like a true professional. Follow this simple guide to learn how to create color splash in Photoshop.
Step 1 – Open The Image In Photoshop

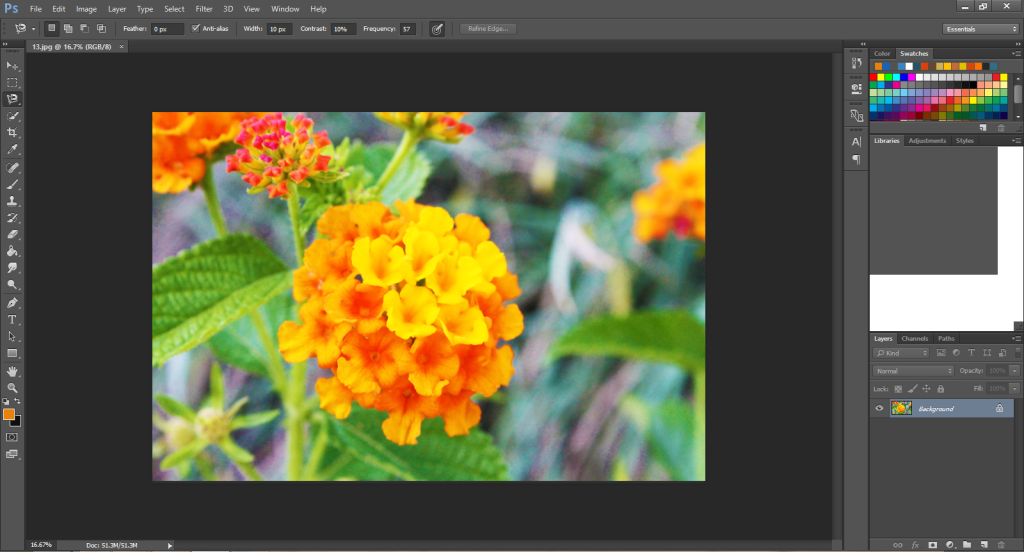
Open the image you want to edit in Photoshop. For the purpose of this tutorial, I am using Adobe Photoshop CC 2015 (the Creative Cloud edition). The placement of the options in the next steps may slightly vary based on the version of Photoshop you are using, but the principles will remain the same.
Step 2 – Add A Black And White Adjustment Layer

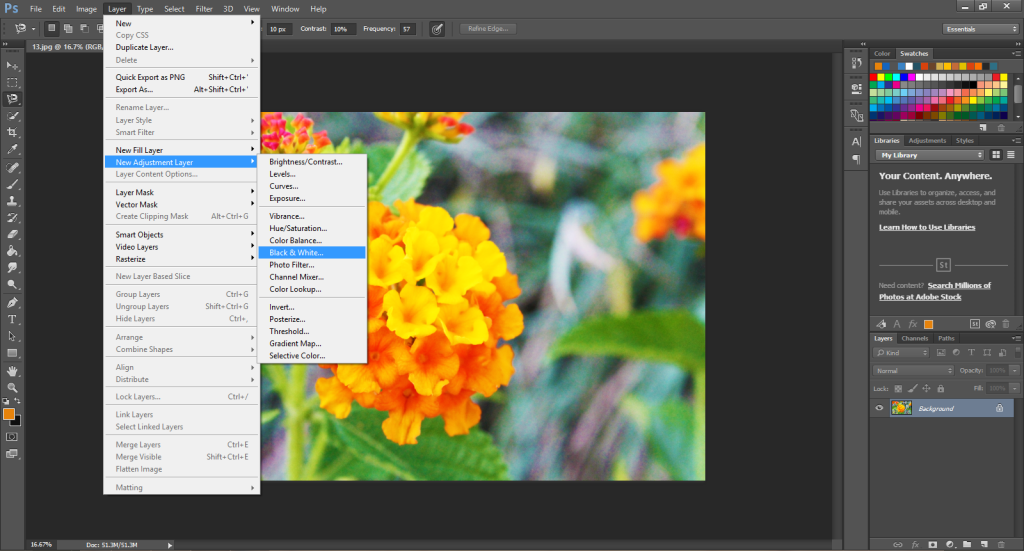
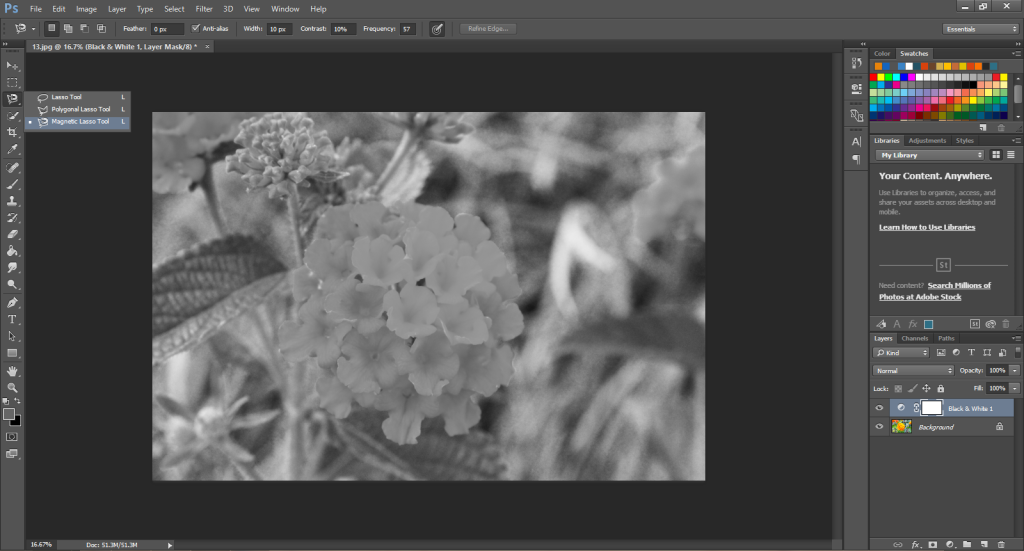
Add a layer of black and white over your image by selecting Layer > New Adjustment Layer > Black & White. Save the new layer under whatever name you like, and you should get a popup on the right that allows you to adjust the hues of the image. By default, the new layer will be completely greyscale, but you may give it any tone you like simply by moving the bars left and right on the Properties tab.
Once you are satisfied with the tone, which will act as your background, you may minimize the popup so you can fully view your image.
Step 3 – Select The Area You Want To Appear In Color

In your editing options, right click on the lasso tool and select “Magnetic Lasso Tool.” We will be using this to outline the area we want to appear in color. You may also use the “Quick Selection Tool” if you prefer. This works well for solid foreground objects that are easily distinguished from the background. In this image, it is easier to use the magnetic lasso because it highlights the border, not individual flower petals like the Quick Select Tool would do.
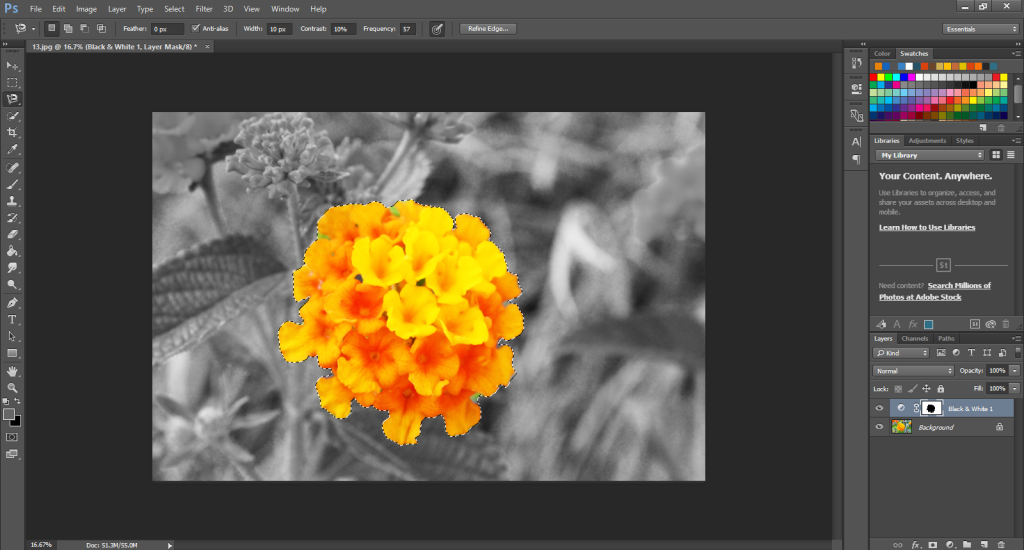
With the Magnetic Lasso Tool, you can set a starting anchor point on the outside of your target area, and then move around the object slowly. You do not need to hold the mouse for this process. The tool will hug to the border of the image on its own. If it is not recognizing the edge you want it to, you can manually select an anchor point by clicking on the spot you want it to go. Do this around the entire object until you connect your lasso. Your selection will appear with a dotted line around it.
Step 4 – Delete That Section Of The Black And White Layer

Once you have the selection you want, simply hit the “Delete” button on your keyboard. This will get rid of that area of the black and white layer to reveal the colorful image below.
Step 5 – Touch Up Your Photo

Use editing tools to correct any issues you have with your new selection. Make sure you are on the background layer when you do the editing, unless you are changing the contrast on the black and white layer.
If there is an area that needs to be colorized that did not get included in your selection, go to the black and white layer and use the lasso tool, quick select tool, or just the eraser to get rid of that part of the black and white. You can do this with as many areas as you like until you achieve the look you want for your image.


